1. Preparing to install Operating System
– Obtain an installation file for Windows 10 that you wish to install.
– Create a DVD or USB for installation that includes Windows 10.
– Adjust the boot device in BIOS to boot from an optical disc or USB.
– The minimum machine specifications required are as follows: (applicable for Windows 10 64bit Lite Edition 2019 v11)
- CPU: Requires an Intel Core 2 Duo or higher processor.
- RAM: Requires at least 1GB of memory.
- Hard disk capacity: Requires at least 16 GB of free space.
- Graphics card: Requires a graphics card that supports DirectX 9 or later.
2. Steps to install Windows 10
Step 1 – Configure the boot device in BIOS
To configure the boot device in BIOS, follow these steps:
- Step 1: Enter BIOS settings.
- Step 2: Locate the boot device configuration menu.
- Step 3: Select the boot device you want to use.
- Step 4: Save changes and exit BIOS settings.
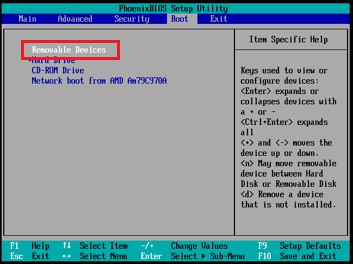
If you use optical discs, select CD-ROM Drive, if you use USB, select Removable Devices.
To install the Operating System, insert the installation disc or USB into the computer, and start it. Once the screen with the Windows 10 logo appears, select where you want to install the OS.
Step 2 – Select the installation location for the operating system
Select the partition where you want to install the Operating System. You have the option to create new partitions on the hard disk drive. To create a new partition, click on “New” and then enter the desired volume. After you’ve finished, click on Apply.
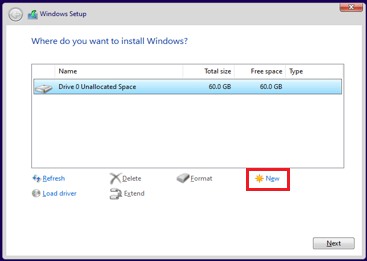
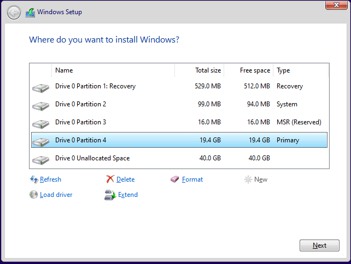
Afterward, a list of created partitions will be displayed. The system automatically creates Recovery, System, and MSR partitions to store system configuration. Do not delete these partitions.
Step 3 – Install Windows 10
Next, select the partition you want to install Operating System, then select Next to install Windows 10. Then, wait for the installation process.

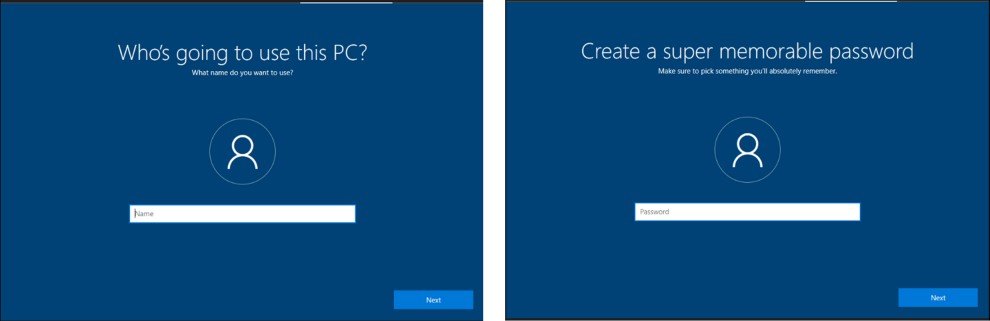
Step 4 – Create a user in Windows 10
Once the installation time has passed, enter your username and password, then click on the Next button.
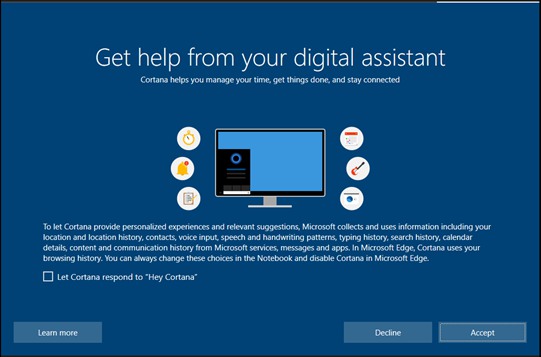
Step 5 – Activate Cortana in Windows 10
On the following screen, you will activate the virtual assistant Cortana.
After it’s finished, the Windows 10 desktop interface will appear. Have fun!