1. The functions of the BIOS program
The BIOS (Basic Input/Output System) program is an essential component of a computer’s motherboard. It is responsible for performing a variety of tasks that are critical to the operation of the computer. Here are some of the primary functions of the BIOS program:
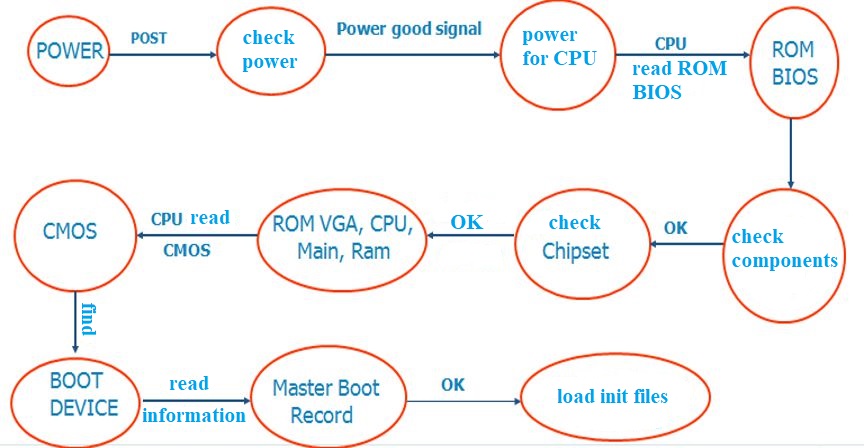
Power-On Self-Test (POST)
When you turn on your computer, the first thing that happens is the Power-On Self-Test (POST). This is a diagnostic procedure that the BIOS program performs to check the computer’s hardware components. The POST checks the CPU, memory, storage devices, and other components to ensure that they are functioning correctly. If the POST detects any errors, it will usually beep or display an error message.
Booting the Operating System
After the POST is complete, the BIOS program is responsible for loading the operating system (OS) into memory. It does this by reading the hard drive’s boot sector or other bootable storage device. The boot sector contains code that tells the BIOS program where to find the rest of the operating system files.
Managing System Settings
The BIOS program also manages various system settings, such as the date and time, boot order, and hardware configuration. During the boot process, you can access the BIOS settings by pressing a key (usually F2, F10, or Delete). The BIOS settings allow you to configure the hardware components and adjust various system settings.
Updating the BIOS Firmware
Finally, the BIOS program can be updated to fix bugs, improve performance, or add new features. The process of updating the BIOS firmware is called flashing. It involves downloading the latest BIOS firmware from the motherboard manufacturer’s website and using a special program to install it. Updating the BIOS firmware can be risky, so following the manufacturer’s instructions is essential.
2. Configuring BIOS settings
The BIOS settings can be configured to optimize the computer system’s performance. Here are the steps to configure BIOS settings:
- Turn on the computer system and press the key (usually F2, F10, or Del) to access the BIOS settings.
- Once inside the BIOS settings, navigate to the advanced settings or configuration settings.
- Look for the settings related to the CPU, memory, and storage.
- Configure the settings according to the desired configuration.
- Save the changes and exit the BIOS settings.
It is important to note that incorrect configuration of the BIOS settings can lead to system instability or failure. Therefore, it is recommended to consult the motherboard manual or seek assistance from a qualified technician before making any changes to the BIOS settings.
Here is an example of how to enter the BIOS settings.
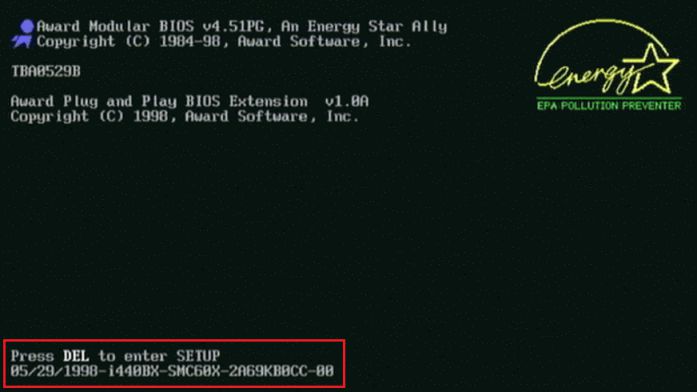
To access the BIOS program, start your computer and press the “Delete”, “F2”, or “F10” keys (or other keys depending on your computer’s manufacturer).
| Computer manufacturer | Key to enter BIOS |
| SONY | F2 |
| HP – COMPAQ | ESC, F10, F2, F6 |
| ACER | F2, DEL |
| ASUS | ESC, F2 |
| DELL | F2 |
Please note that in some cases, you should try all possible keys.
Here are some settings you can find in BIOS.
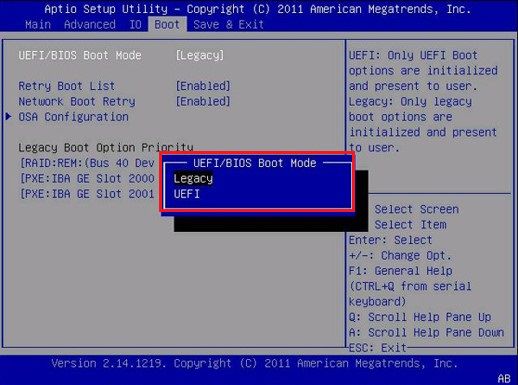
Boot Mode: UEFI/Legacy.
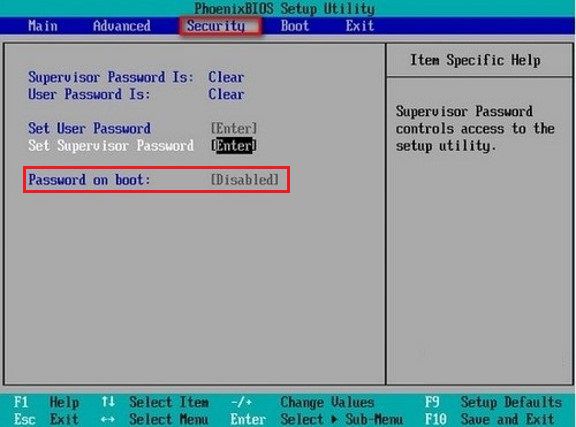
Create a password for BIOS.
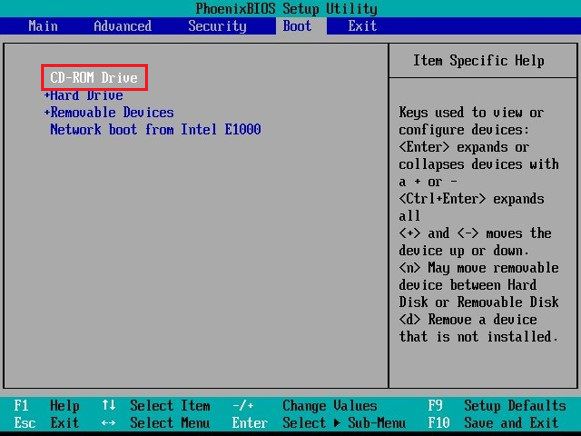
Select the appropriate boot device.
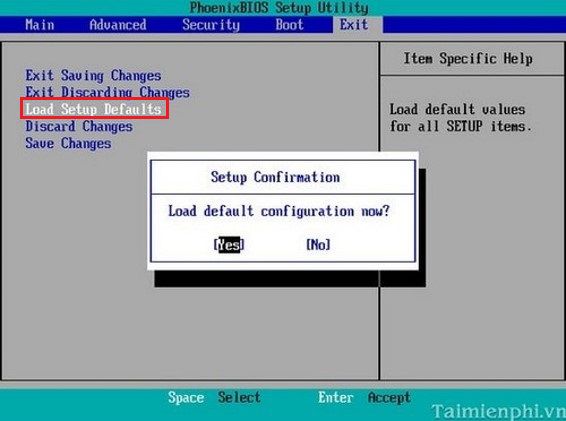
Load the default BIOS settings.