1. Lesson objectives
This guide will help students learn how to partition a hard disk drive using Hiren’s BootCD.
2. Lesson content
Creating a hard drive partition involves dividing a hard disk drive into one or more separate sections that can be managed independently. For more information, please refer to the article What is a hard disk partition and how do you create one?
Users often divide their hard disk drives into partitions with smaller storage capacities to organize files and folders more reasonably, depending on their purposes and storage needs. The operations that can be performed on partitions of a hard disk drive include:
- Formatting partitions
- Creating partitions
- Deleting partitions
- Merging partitions
- Changing the name of partitions
There are many tools available for partitioning, such as Hiren’s BootCD, EaseUS Partition Master, and Mini Tool Partition Wizard. This article will guide you through partitioning your hard disk drive using Hiren’s BootCD.
3. Partition hard disk drive using Hiren’s BootCD
1 – Setup boot device from CD-ROM in BIOS.
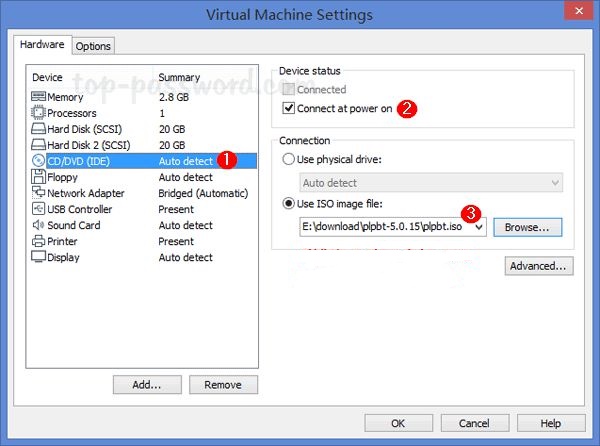
2 – In Settings on the virtual machine, insert the Hirent’s Boot CD 13.2 or Hirent’s Boot CD 15.2 disc into the CD-ROM device.
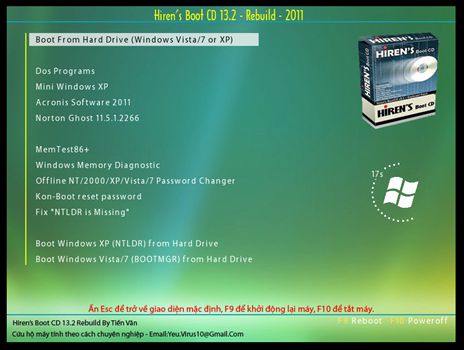
3 – Start the virtual machine in the display mode shown in the image, then select Dos Programs.
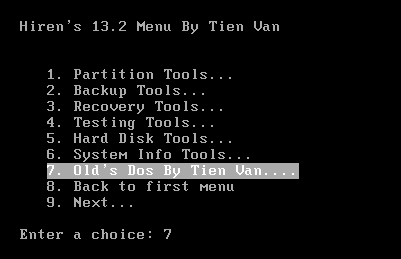
4 – Choose Old’s Dos to utilize Hiren’s Boot CD.
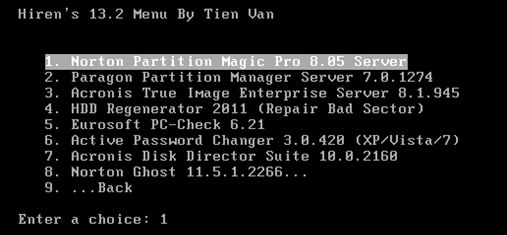
5 – Choose Norton Partition Magic Pro to partition the disk.
6 – A list of hard drives appears and we select the correct hard drive that we want to partition.
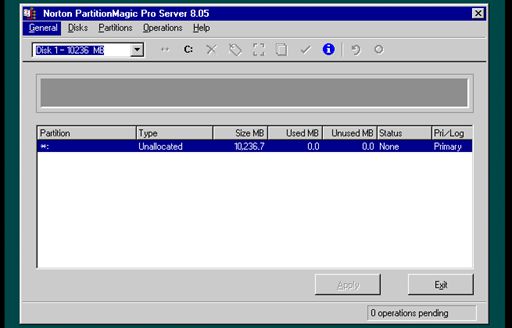
7 – To create a new partition, follow these steps:
- Right-click on an empty partition with Unallocated status.
- Select Create from the options.
- Set the configuration of the partition to be initialized with the following options:
- Create as: select the partition as a primary or extended partition
- Partition Type: choose the partition type
- Label: label the partition
- Size: set the size of the partition
- Cluster size: set the cluster size of the partition
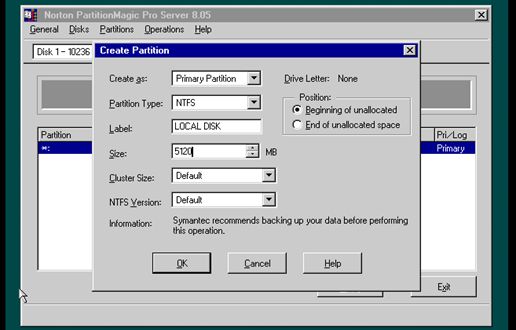
Below is an example of creating partitions.
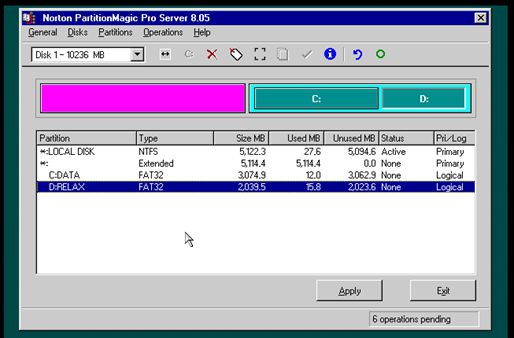
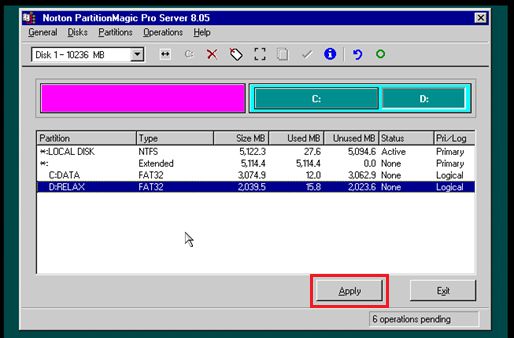
8 – We must press the Apply button to finish creating the partition.
4. File system and rename partition
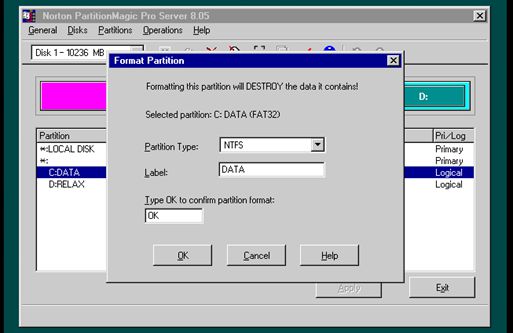
– File System: Right-click on the partition and select Format. Confirm the format by entering OK. (Note: Formatting will delete all data after the format).
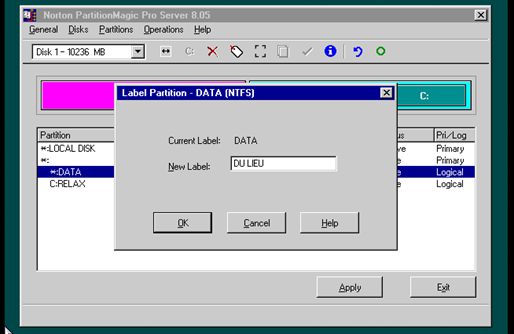
– Rename partition: Right-click on the partition and select Label (Note: all data after formatting will be unaffected).
– Merge partition: To merge two partitions, select one, then right-click and choose Merge. The data from both partitions will be contained in a new partition labeled with Folder Name.

Some common errors when merging partitions:
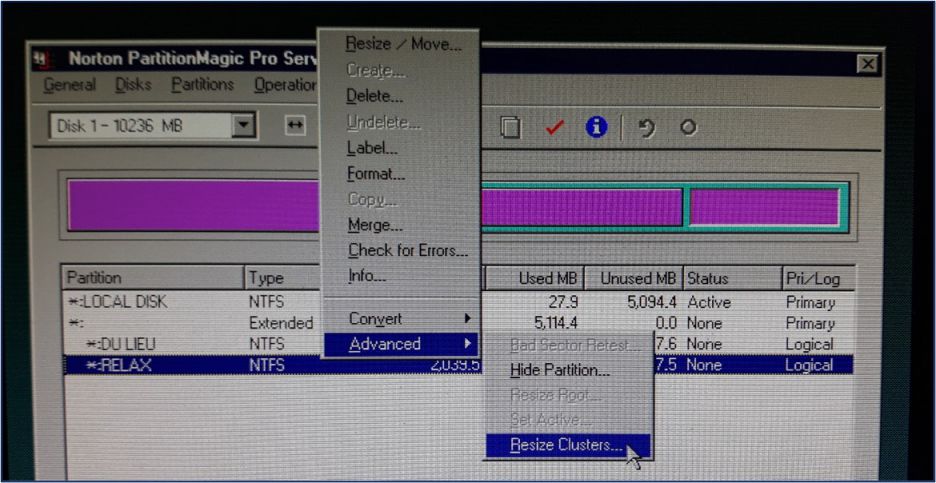
- There is a difference in the cluster size between the two partitions that need to be merged.
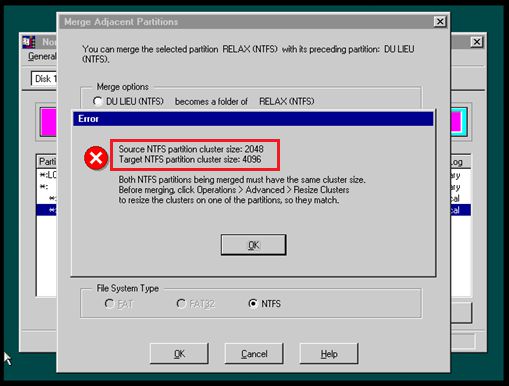
We choose one of the two partitions to adjust the cluster size value so that it is consistent between the two partitions that need to be merged.
- There are differences in the File System (FAT32 or NTFS) between the two partitions, we need to adjust or reformat the two partitions.
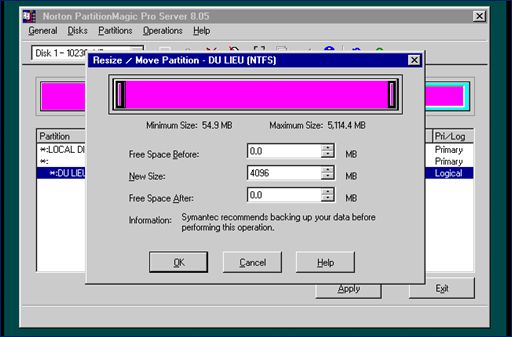
– Change the size of a partition: select the partition you want to resize and modify the partition capacity in the “New size” section.
5. Requirement of practice
To complete this task, follow these steps:
- Create a virtual machine with the name formatted as Student ID.
- Please configure it as follows:
- Operating system: Windows 10
- RAM capacity: 2048 MB
- HDD capacity: 100 GB
- Processor: 1 CPU – 2 cores
- BIOS timeout: 10 seconds
- Choose boot device: CD-ROM
Then, use Magic Partition Tool to format and partition the hard drive into:
- System partition: 50 GB (Primary – NTFS – Set Active)
- Private partition: 30 GB (Logical – FAT32)
- Public partition: 20 GB (Logical – FAT32)
– Format Private, Public partitions to NTFS
– Merge Private partition to Public partition with new label Personal
– Adjust to resize the size of the Public partition to 15 GB
– Create a new partition on an empty partition with the label Social (Logical – NTFS)
– Rename System partition to OS