1. Lesson objectives
This lesson will help students understand the installation steps for the CentOS operating system. By the end of this lesson, students will be able to deploy the installation on virtual and physical machines.
2. Introduction to CentOS
CentOS is an open-source Linux operating system that is available for free. CentOS stands for “Community Enterprise Operating System“. It was released in May 2004 and is based on the Red Hat Enterprise Linux (RHEL) distribution.
The main goal of CentOS is to provide a free server system platform for businesses, as well as a suitable environment for programming. The CentOS 7 version has a sizable user community, making it a good choice for installation guidance.
3. Preparing for CentOS installation
– Download the installation file of CentOS 7.
– Create a DVD or USB containing CentOS.
– Custom boot device from optical disc or USB.
– Minimum machine configuration requirements: (using CentOS 7-1810 version)
- CPU: 1.0 GHz or higher
- RAM: 512 MB or more (using LiveGNOME or LiveKDE version).
- Hard disk drive capacity: at least 10 GB of free space.
4. Steps to install CentOS
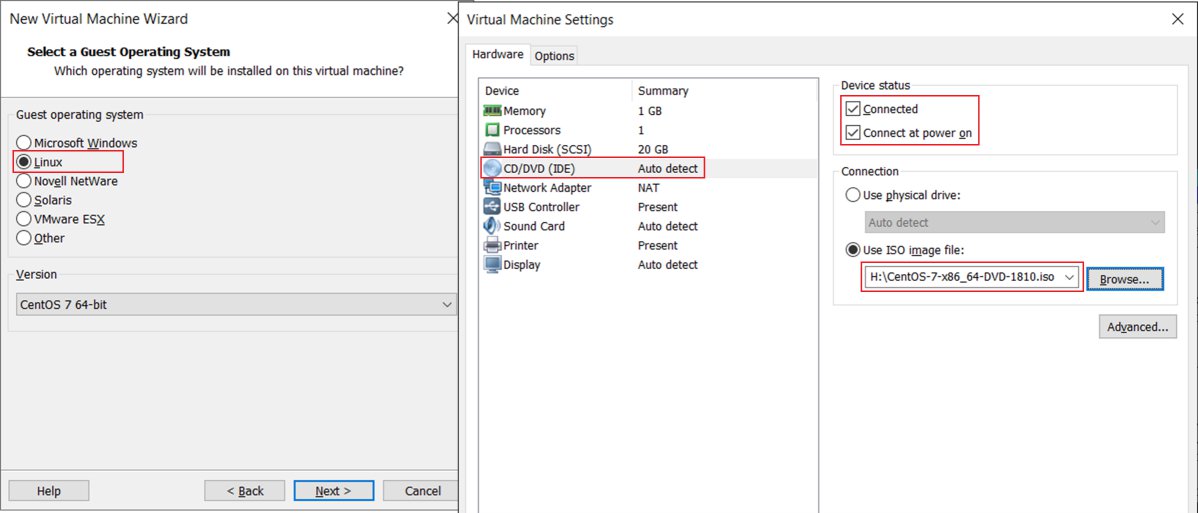
To prepare a virtual machine that meets the requirements, please refer to the article Create virtual machines with VMware Workstation. Please ensure you have selected the correct operating system to install and have inserted the CentOS 7 disc into the optical disc drive. And you can refer to the article Setup Windows 10 installation from an optical disc or USB to learn how to install OS from an optical disc or USB.
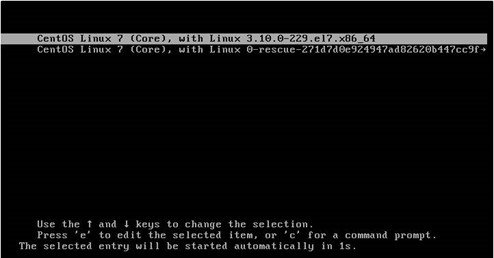
Then, restart the virtual machine, you will see the screen below. Use the up or down arrow keys to select the line Install CentOS 7. Press the Enter key to start the installation process.
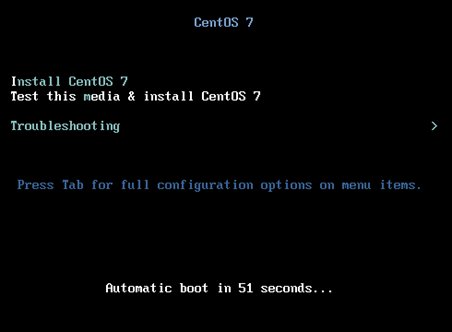
Note: Once the key is pressed correctly, the installation process will start. If the device restarts during installation, do not press the key again as it will cause the process to restart from the beginning.
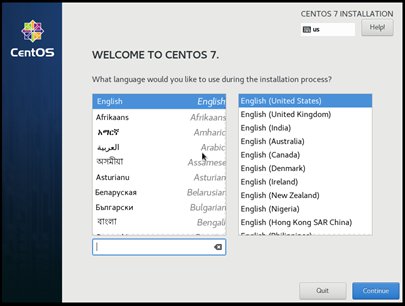
The language selection screen will appear next. By default, it will be set to English –> English (United States).
The next step is to set up the system settings.
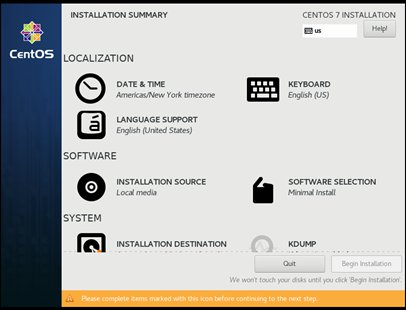
– Set the default language (KEYBOARD, LANGUAGE SUPPORT) to English.
– Set time (DATE & TIME), select Region: Asia and City: Ho Chi Minh City. And click Done to finish.

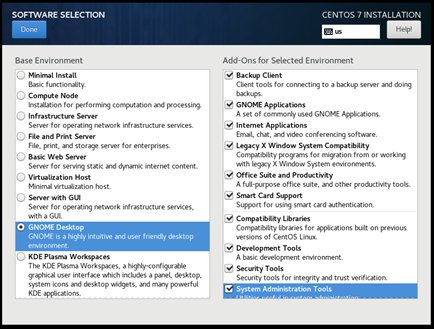
– Install the version of CentOS 7 (SOFTWARE SELECTION) depending on the intended use of the operating system.
- Minimal Install: This configuration consumes the least resources, suitable for the server.
- Gnome Desktop: This configuration has a graphical interface, suitable for new users.
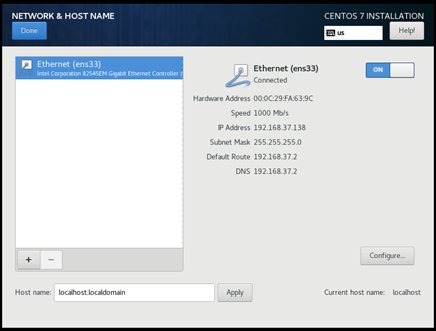
Turn it on to configure the network connection (NETWORK & HOST NAME). You can set it up after installation using the nmtui utility.
Next, select INSTALLATION DESTINATION. Choose to drive and check I will configure Partitioning and then click Done.
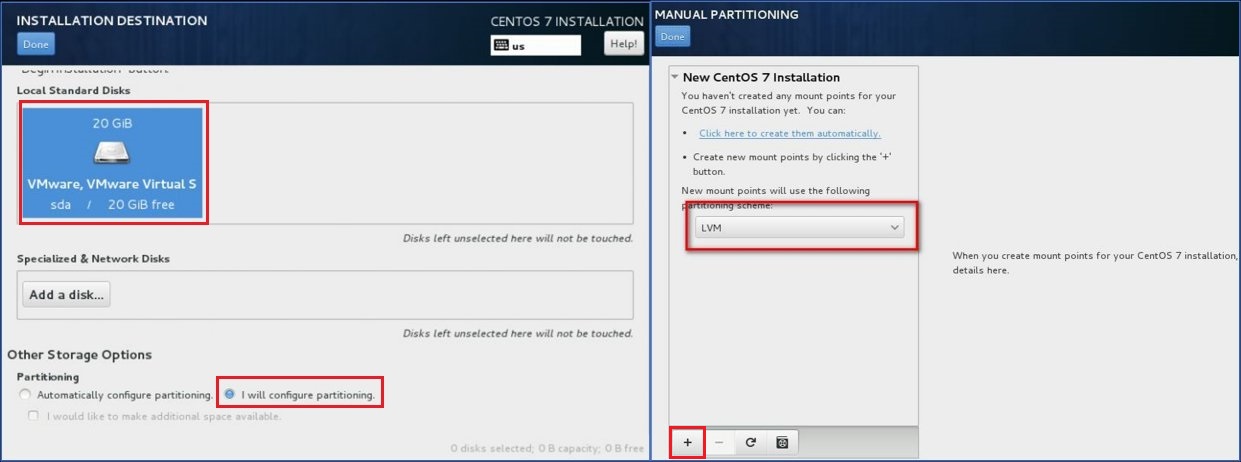
To partition a drive in CentOS, follow these three steps: (1) Set the size of the boot partition. (2) Set the size of the swap partition. (3) Set the size of the root partition.
Next, we proceed to partition the hard drive and select LVM in Partitioning Scheme, following these steps:
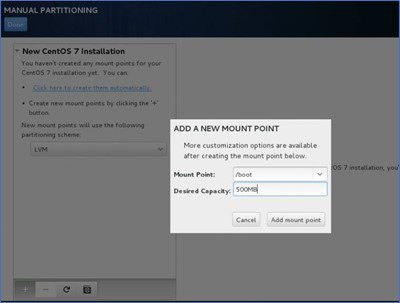
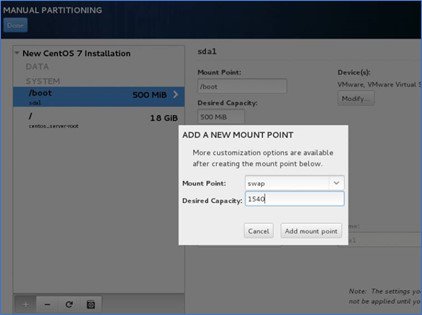
Step 1 – Create /boot partition: choose the + button, enter capacity, and select Add Mount Point. The capacity of /boot partition about 500MB is enough.
Step 2 – To optimize your system, create a swap partition with a capacity of 1.5 to 2 times that of your RAM. For instance, if you have 1GB of RAM, it’s recommended to create a 1.5GB swap partition.
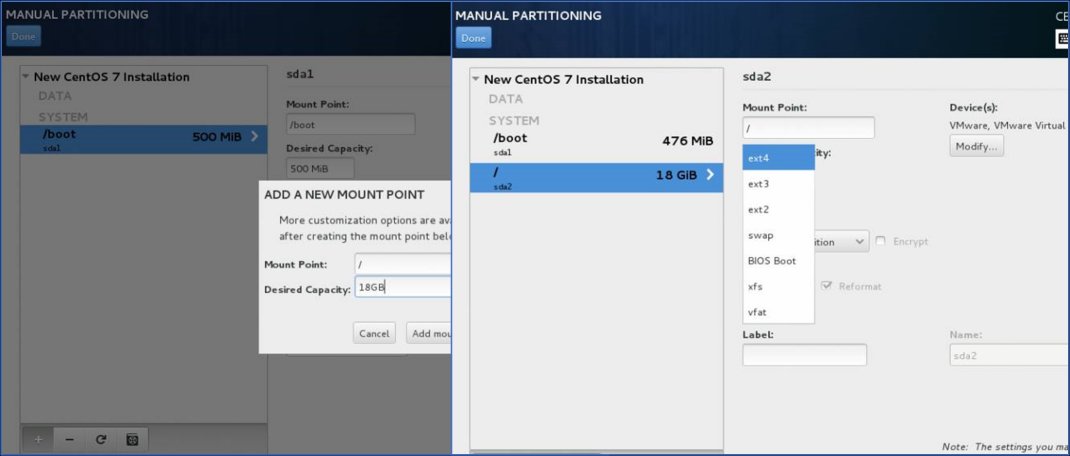
Step 3 – To create a root partition, take all remaining hard drive space on your machine. Click “Add mount point“, select “ext4” in the File System, and click “Update Settings“.
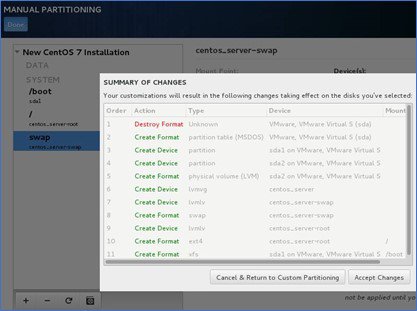
Next, to format and create the partition, click “Done” and then “Accept Changes“.
Then, return to the INSTALLATION SUMMARY and click “Begin Installation” to begin the installation process.
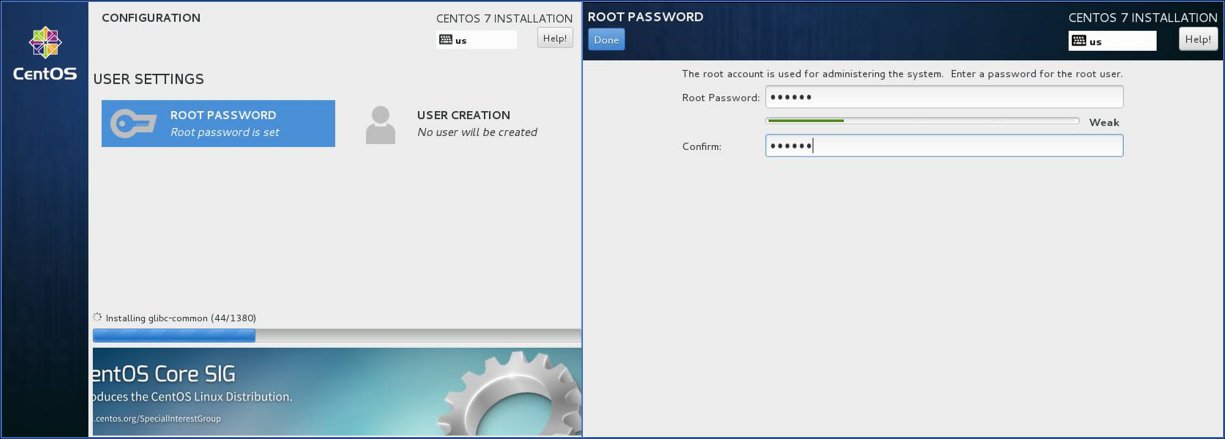
The next step is to create a password and an account. Click User Creation to create a new account and set a password for the user account. Click Root password to set a password for the root account (top-level account), and enter a strong enough password (containing uppercase, lowercase letters, numeric characters, and special characters like P@ss#1508).
We are waiting for the installation for about 5-10 minutes. When the installation is finished, the server will restart.
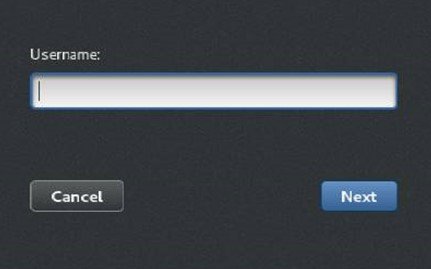
The login screen appears, enter Username then click Next and enter the password.
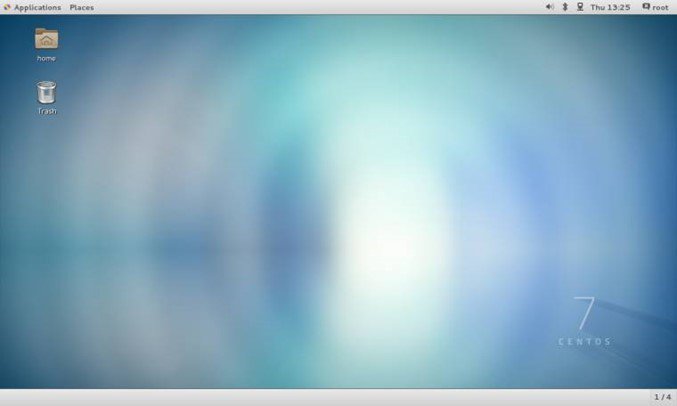
The GNOME graphical interface appears. The CentOS 7 operating system has been installed.
5. Requirement of practice
The requirement set up a virtual machine, follow these steps:
- Create a virtual machine with the name formatted as Student ID
- Choose the following configurations:
- Operating system: CentOS 7 x64
- RAM capacity: 1024 MB
- HDD capacity: 50 GB
- Processor: 1 CPU – 2 cores
- BIOS timeout: 10 seconds
- Choose boot device: CD-ROM
Using the .iso file of CentOS 7 x64 to partition and install CentOS:
- /boot partition: 500MB
- Swap partition: 1.5 GB
- /partition: 20 GB
- /home partition: 20 GB
- /root partition: 8 GB
The username of the account is Student ID, and the password is svCKC@123