1. What is a virtual machine?
A virtual machine is a program that emulates a computer system. It operates based on the architecture and hardware components of the physical machine.
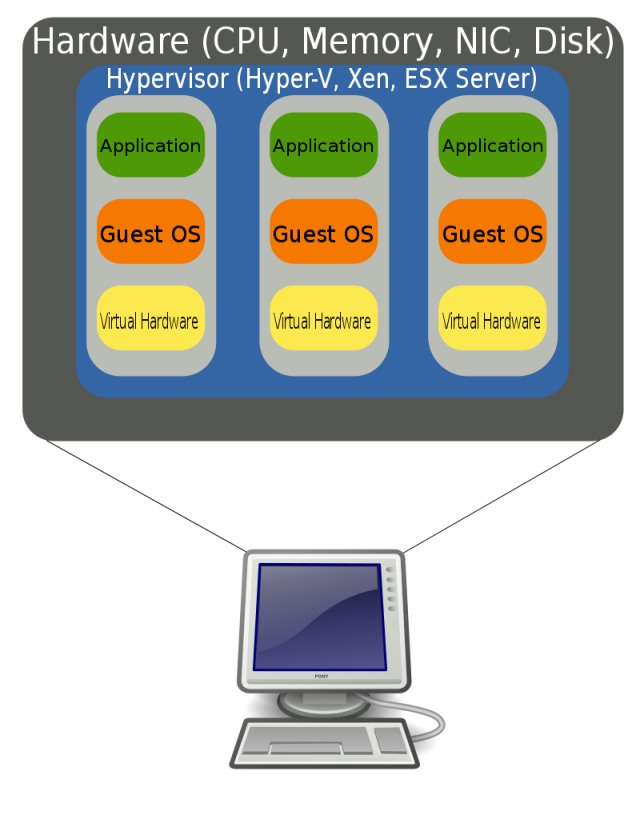
Virtual machines offer an excellent alternative to physical machines. In certain instances, virtual machines can provide better performance than physical machines, such as in software testing, experimenting with new operating systems, and dealing with malware.
In the curriculum, virtual machines will be used to allow students to perform practical operations without affecting the physical machine.
Several software can be used to create virtual machines on a physical computer, including VMware Workstation, VM VirtualBox, and Windows Virtual PC.
2. Steps to create a virtual machine with VMware Workstation
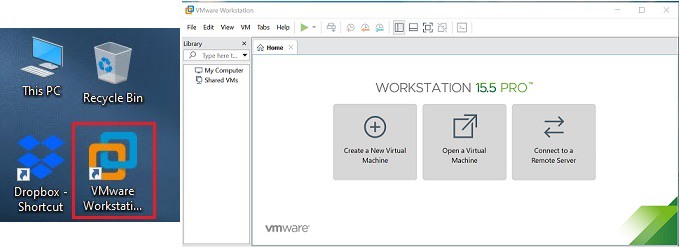
To get started, simply download and install VMware Workstation software from https://www.vmware.com/products/workstation-pro.html. Once the installation is complete, open the VMware Workstation program on your computer.
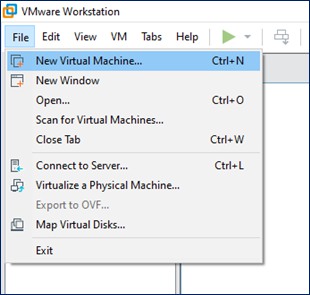
To create a new virtual machine, select File, then choose New Virtual Machine.
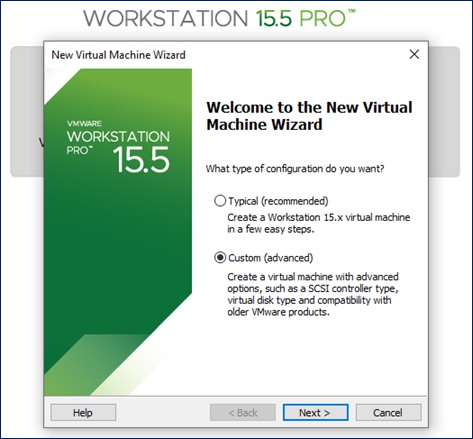
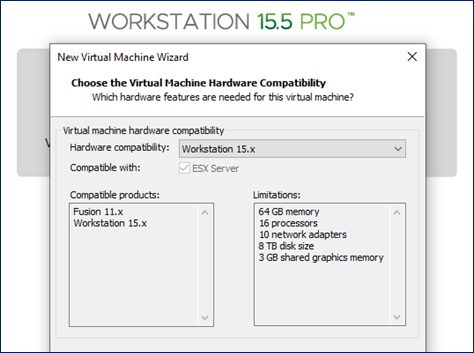
Select “Typical” to create a default virtual machine, or select “Custom” to configure a virtual machine.
Then, select the hardware that is suitable for the virtual machine to be created.
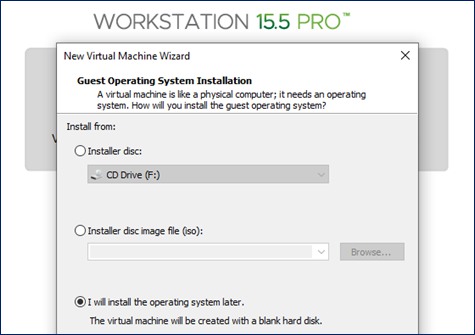
Please choose the operating system you wish to install from the following list of options:
- Installer disc: Install the operating system from your computer’s CD-ROM drive.
- Installer disc image file (iso): Install the operating system using a virtual disk file (*.iso).
- I will install the operating system later: Enable virtual machine initialization before installing the operating system.
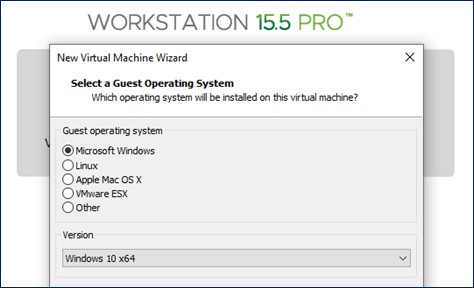
Select the operating system to use for the virtual machine to be created.
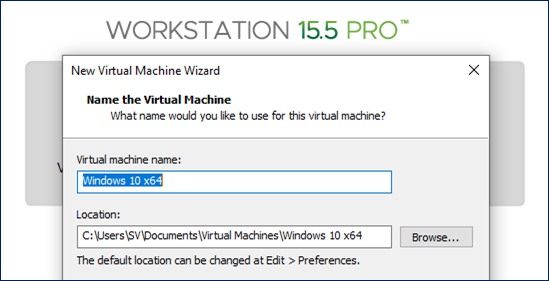
Set up the name and folder where the virtual machine will be stored. Please remember this.
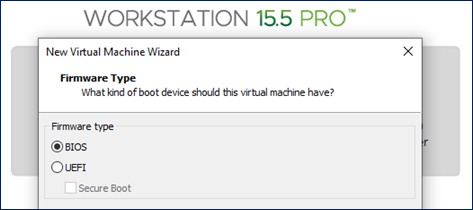
Please choose between BIOS or UEFI firmware type.
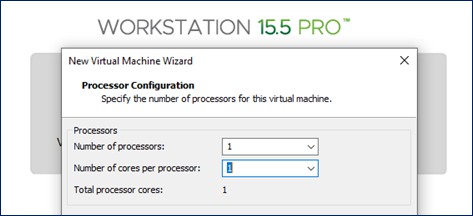
To configure the processor for the virtual machine, set the number of processors and the number of cores per processor.
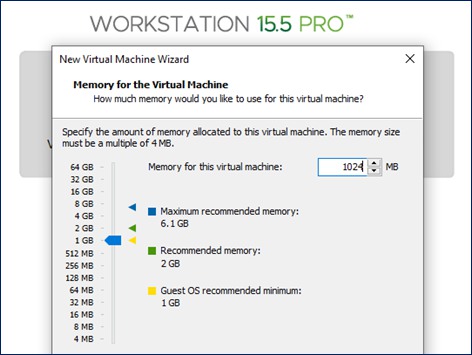
To determine the appropriate capacity for RAM of the virtual machine, use the slider or enter the capacity directly.
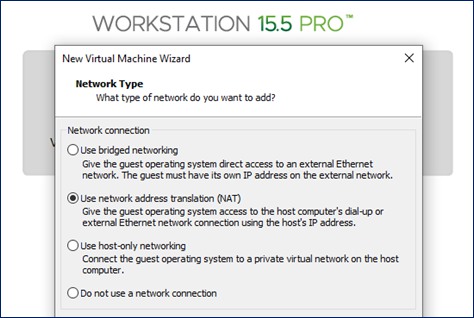
Choose the network connection configuration setting that best fits your virtual machine creation requirements.
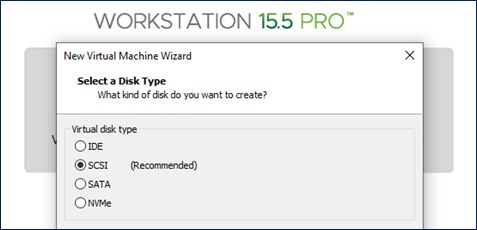
Please select the type of disk.
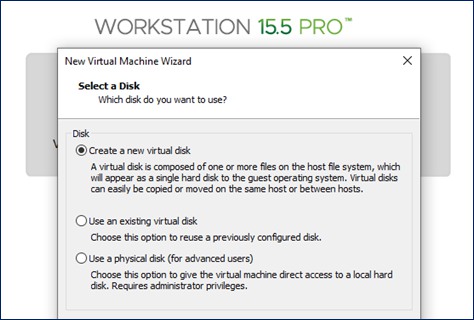
Please choose a disk to utilize.
Set maximum hard disk capacity with various creation options.

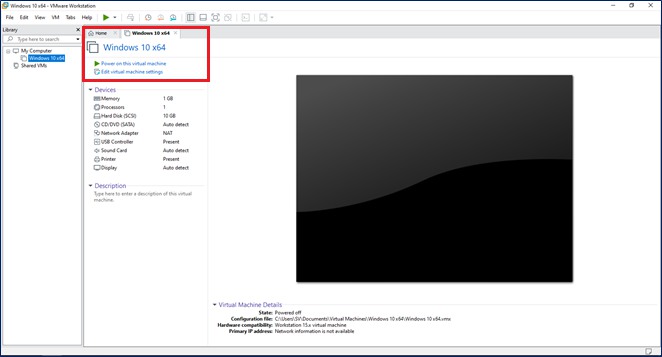
A virtual machine created successfully.
3. Set the BIOS timeout and Boot mode in the BIOS settings
3.1. Configure BIOS timeout of virtual machine
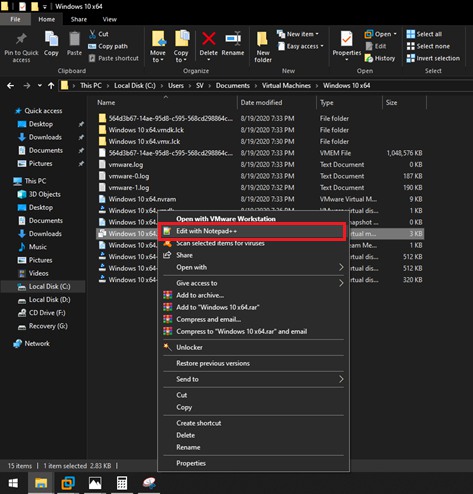
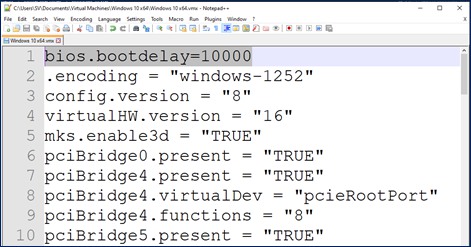
To access the virtual machine configuration file, go to the directory where it is stored. Look for the file named [name_virtual_machine].vmx (VMware Virtual Machine Configuration File). Right-click on the file, and select Edit with Notepad++.
To set a delay before starting the operating system, add the configuration line bios.bootdelay=<value>, where <value> is the waiting time in milliseconds.
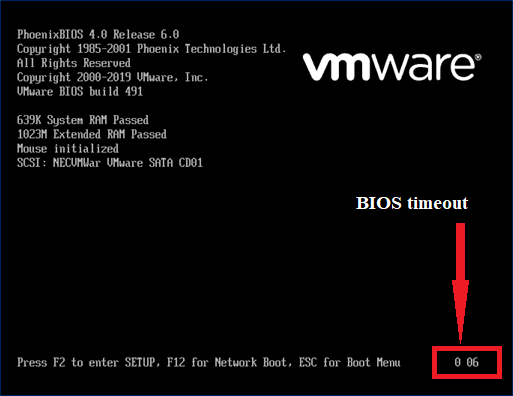
To start the virtual machine, you need to enter the BIOS within a given time limit.
3.2. Configure Boot mode in BIOS
To adjust the priority order for loading data from CD-ROM, HDD, or USB, enter the BIOS program (see the article BIOS in computer and configuring BIOS settings). Then, go to the Boot tab. Use the up and down arrow keys (↑↓) to select lines and the plus and minus (+/-) keys to change the priority order.
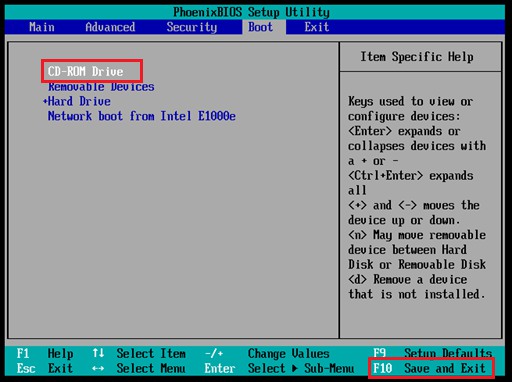
To save the selected Boot mode and exit the BIOS, press the F10 key.
4. Requirement of practice
To complete this task, follow these steps:
- Create a virtual machine with the name formatted as Student ID.
- Please configure it as follows:
- Operating system: Windows 10
- RAM capacity: 2048 MB
- HDD capacity: 100 GB
- Processor: 1 CPU – 2 cores
- BIOS timeout: 10 seconds
- Choose boot device: CD-ROM