1. Lesson objectives
Teach students the process of installing the Windows 10 operating system on VMware.
Students can install operating systems on both virtual and physical machines.
2. Introduction to operating system installation
Windows 10 operating system was released on July 29, 2015, and its interface is a combination of Windows 7 and Windows 8.1.
This operating system is currently running on 400 million devices, estimated to account for 27.72% of computers. This shows that the practical demand for this operating system is currently very high for the majority of users.
Understanding and practicing the steps to install Windows 10 is essential for every IT (Information Technology) student.
3. Preparing for installation
– Download the installation file for Windows 10, go to https://www.microsoft.com/en-us/software-download/windows10.
– Please create an installation DVD or USB that is compatible with the system requirements.
– Configure the boot device, access the BIOS settings, and select either the optical disc or USB option.
– Requires minimum machine configuration: (for Windows 10 64bit Lite Edition 2019 v11)
- CPU: Intel Core 2 Duo or higher.
- RAM: 1GB or more.
- Hard disk capacity: at least 16 GB of free space (60 GB).
- Graphics card: DirectX 9 or later.
4. Guides for installing Windows 10
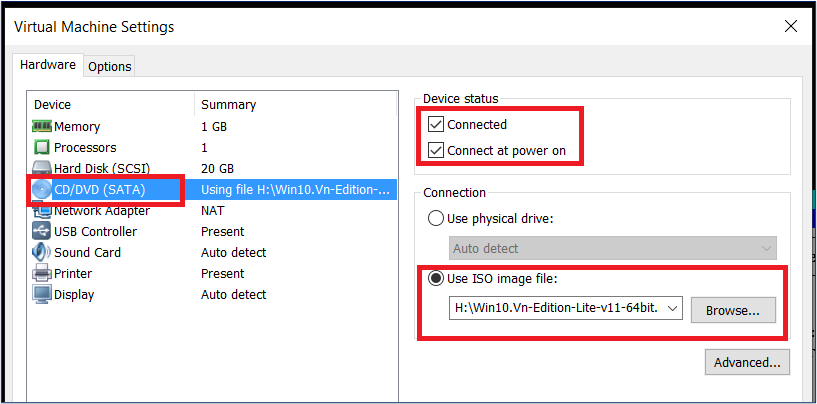
First of all, we need to create a virtual machine that fulfills the specifications outlined in Part 3. (refer to the article Create virtual machines with VMware Workstation). Next, insert the Windows disc into the optical drive as shown below.
4.1. Setup Windows 10 installation from an optical disc or USB
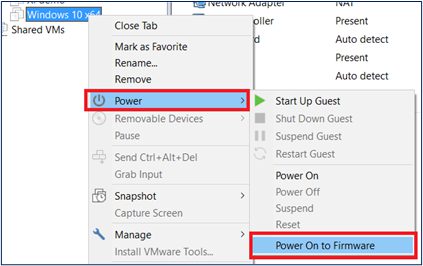
Once the virtual machine is created successfully, set up the boot device on BIOS from an optical disc. Right-click on the virtual machine (it must be off), select Power and then select Power On to Firmware to access the Boot configuration.
The interface below will show up to configure the boot device on the BIOS.
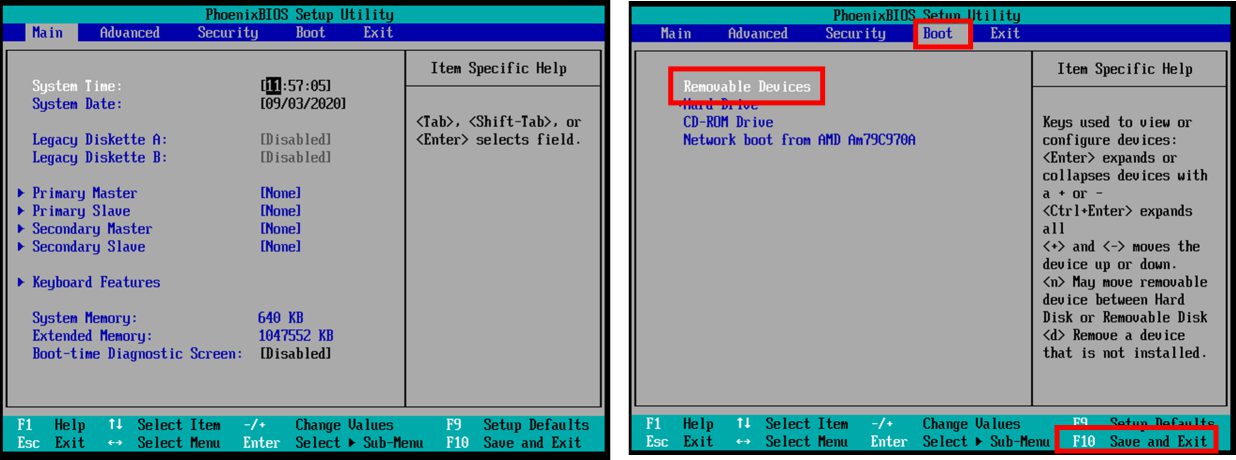
To select the boot device, use the up and down arrow keys (↑↓). If using DVD/CD, choose CD-ROM Drive. If using USB, choose Removable Devices. Use the + or – keys to change the order of boot devices. The device at the top of the list will have higher priority on boot. After configuring the settings, select F10 to save them. The computer will then boot the Windows 10 installation disc.
4.2. Steps to install Windows 10 on VMware
To begin the installation process, turn on the computer and wait for the message “Press any key to boot from CD or DVD…” to appear. Then, press the “Enter” key.

Note:
- If you press the key too late, you’ll need to reset the computer and press the key again.
- After pressing the key successfully, the installation process will start. If the installation process is restarted to this step, don’t press any key. Pressing the key will restart the installation process and reinstall from the beginning.
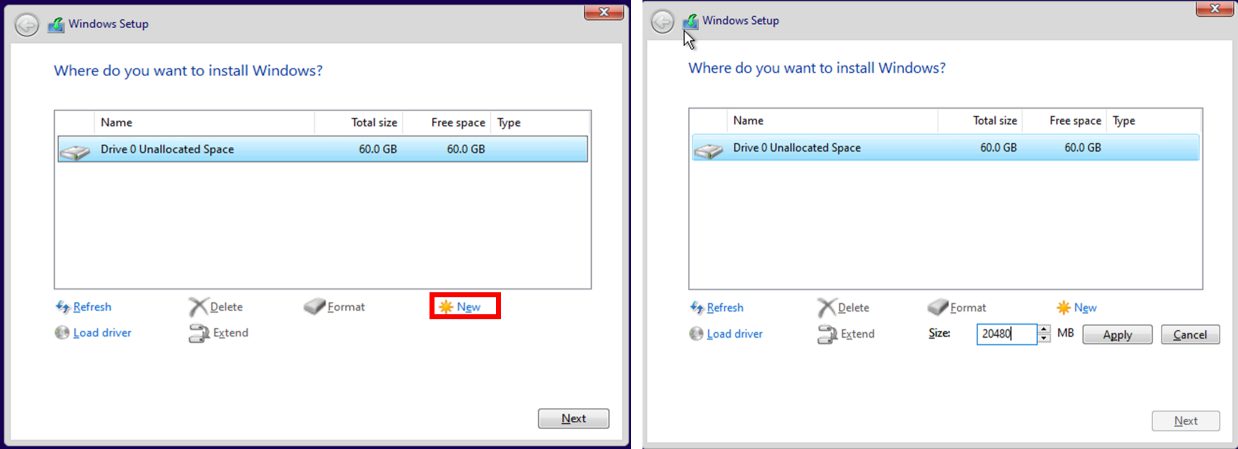
Once the screen with the Windows 10 logo appears, it will show the partition screen on the physical drive (if it hasn’t been partitioned yet).
To create a new partition, simply click the New button and enter a capacity of 20480MB. Once complete, click the Apply button.
Afterward, the system will show a list of partitions that have been created, including the automatically created Recovery, System, and MSR partitions which are utilized to store system configuration and should not be deleted.
To create another partition, select the remaining 40GB partition, click on New, and enter the remaining amount. Then, select the 20GB partition, and click on Next to install Windows 10 in the 20GB partition.
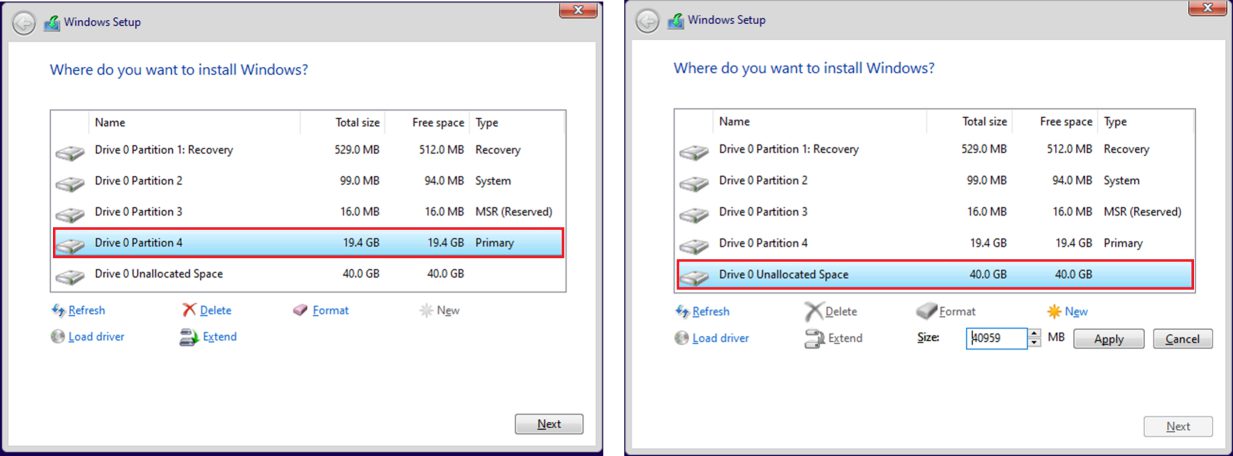
Note: All partitions created are Primary Partition

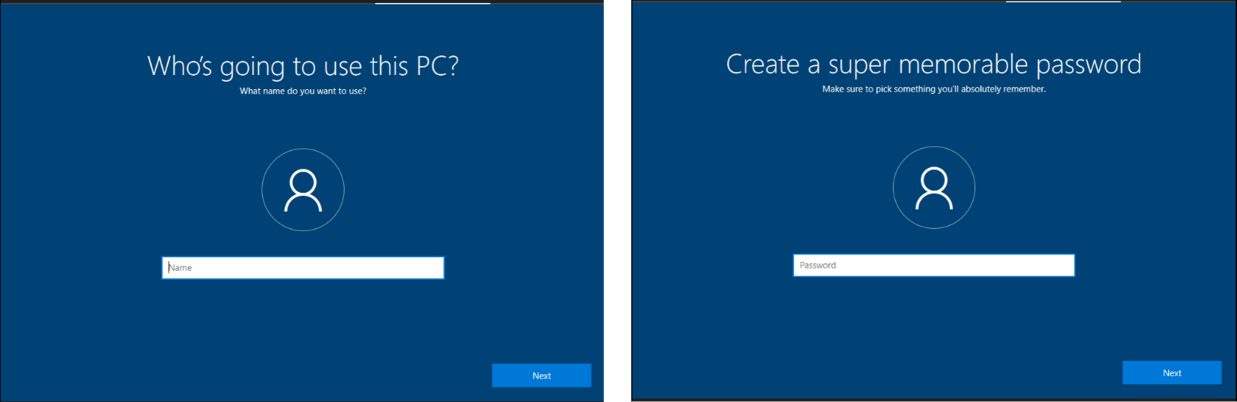
Next, the screen to enter the name will appear, enter the name. And select Next, enter the password, and select Next.
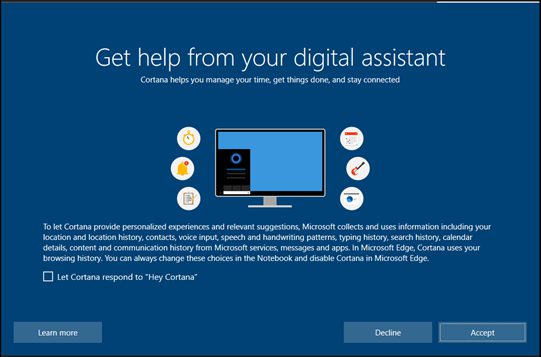
On the next screen, we can activate the Cortana virtual assistant.
Once completed, the interface of Windows 10 will display. And complete the installation.
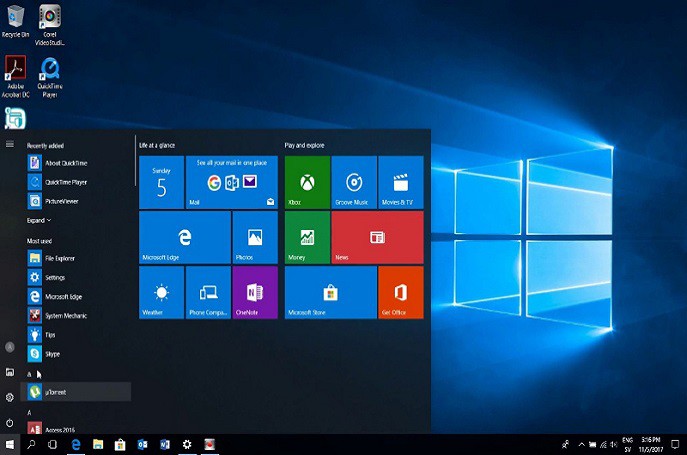
Note: Once the installation is done, connecting your computer to a wifi network is necessary. This allows the operating system to download drivers, software, and security patches. Doing so will help to ensure that your device operates smoothly and with better performance.
5. Requirement of practice
To complete this task, follow these steps:
- Create a virtual machine with the name formatted as Student ID.
- Please configure it as follows:
- Operating system: Windows 10
- RAM capacity: 2048 MB
- HDD capacity: 100 GB
- Processor: 1 CPU – 2 cores
- BIOS timeout: 10 seconds
- Choose boot device: CD-ROM
To partition and install the operating system, use the Windows 10 64-bit Lite Edition 2019 v11 .iso file. Your computer has the following partitions:
- Partition 1: 20 GB (use to install Windows 10)
- Partition 2: 15 GB
- Partition 3: 15 GB
The account is student ID, password: svCKC@123
Active Cortana for voice communication